How to Fix Bad Lighting in Interior Photos with AI
Fix dark rooms, harsh ceiling lights, and yellow color casts in interior photos. Follow practical AI relighting steps, copy prompts, and compare the details.
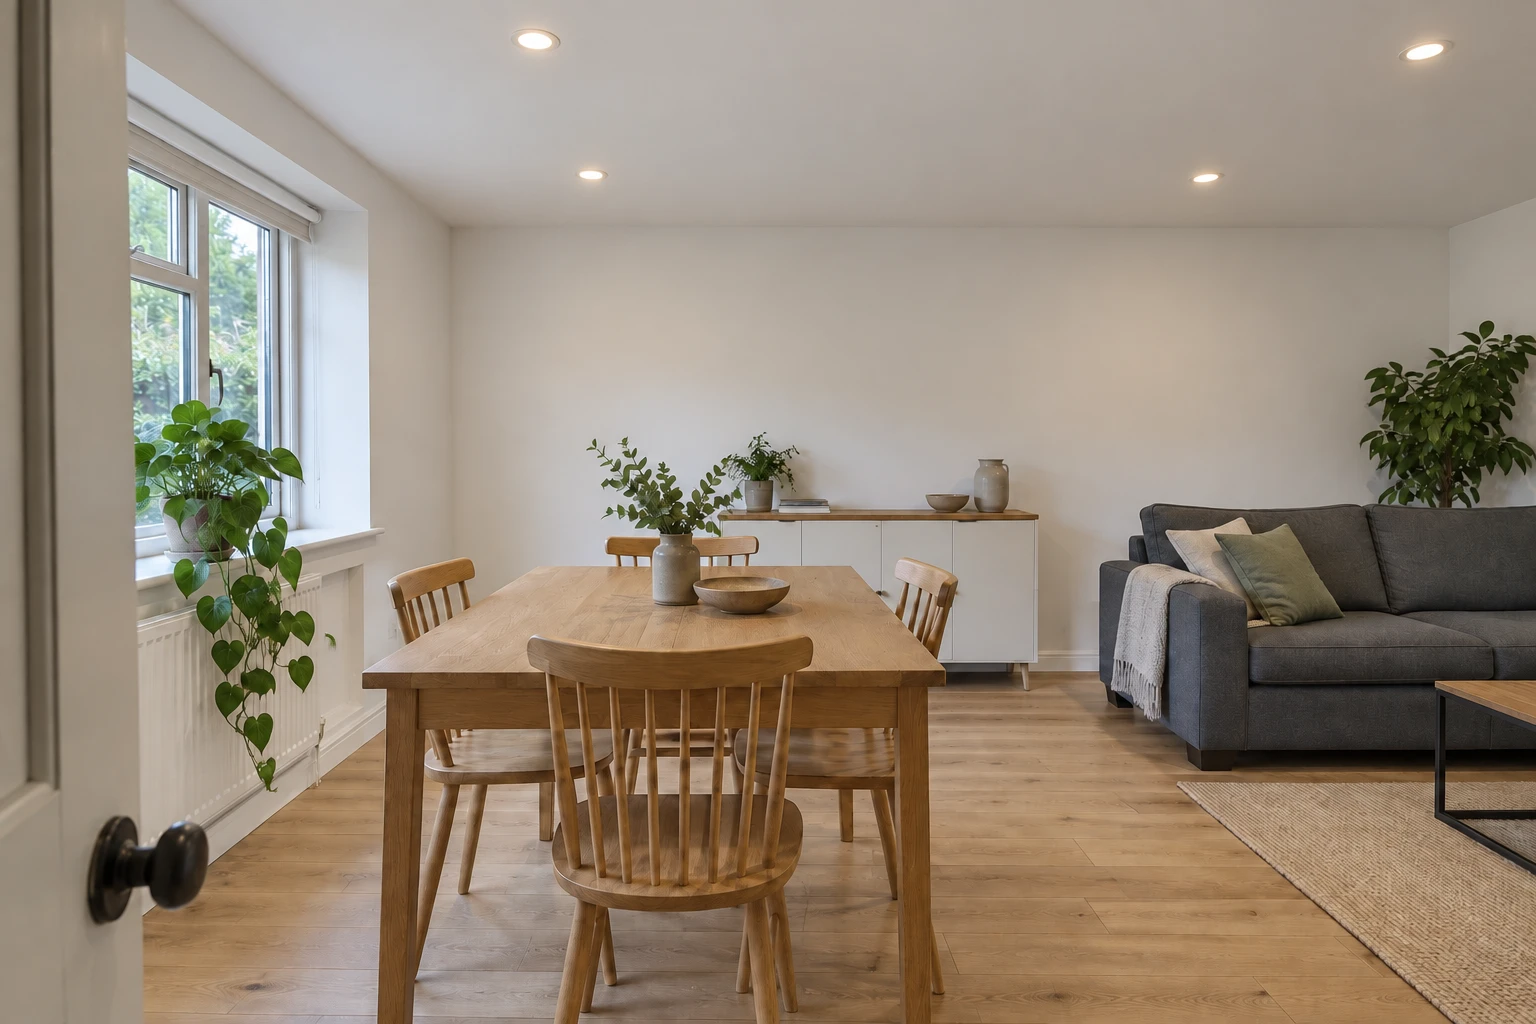
The sofa is too dark, the ceiling looks yellow, and the downlights are bright white blobs. Raising brightness makes the lights worse; cooling the whole picture turns the wood gray.
To fix lighting in an interior photo, separate the problems: lift the dark areas, reduce the spread of harsh highlights, and correct the color cast where it appears. In an AI relighting tool, describe those changes and name the furniture, materials, and camera view you want to keep.
Match the edit to the problem
| What you see | What to ask for | What to avoid |
|---|---|---|
Dark sofa, floor, or corners beside a bright window | Lift those shadows while retaining window brightness and natural contrast | Brightening the entire frame equally |
Recessed lights surrounded by large white halos | Reduce the halos; keep the lights on and retain their trims | Turning the lights off or changing their shape |
A white ceiling looks yellow or orange | Neutralize the ceiling's color cast while keeping its shading | Recoloring all warm materials or making the ceiling glow |
Different parts of the room look blue and yellow | Balance the mixed lighting while retaining material colors | Applying a strong warm or cool filter to everything |
If the whole image only needs a small exposure or white-balance adjustment, start with your regular photo editor. Lightroom's tone and color controls let you adjust shadows, highlights, and white balance without generating new room details. AI relighting is useful when you want to describe a more selective change in plain language.
A room with dark furniture and a yellow ceiling
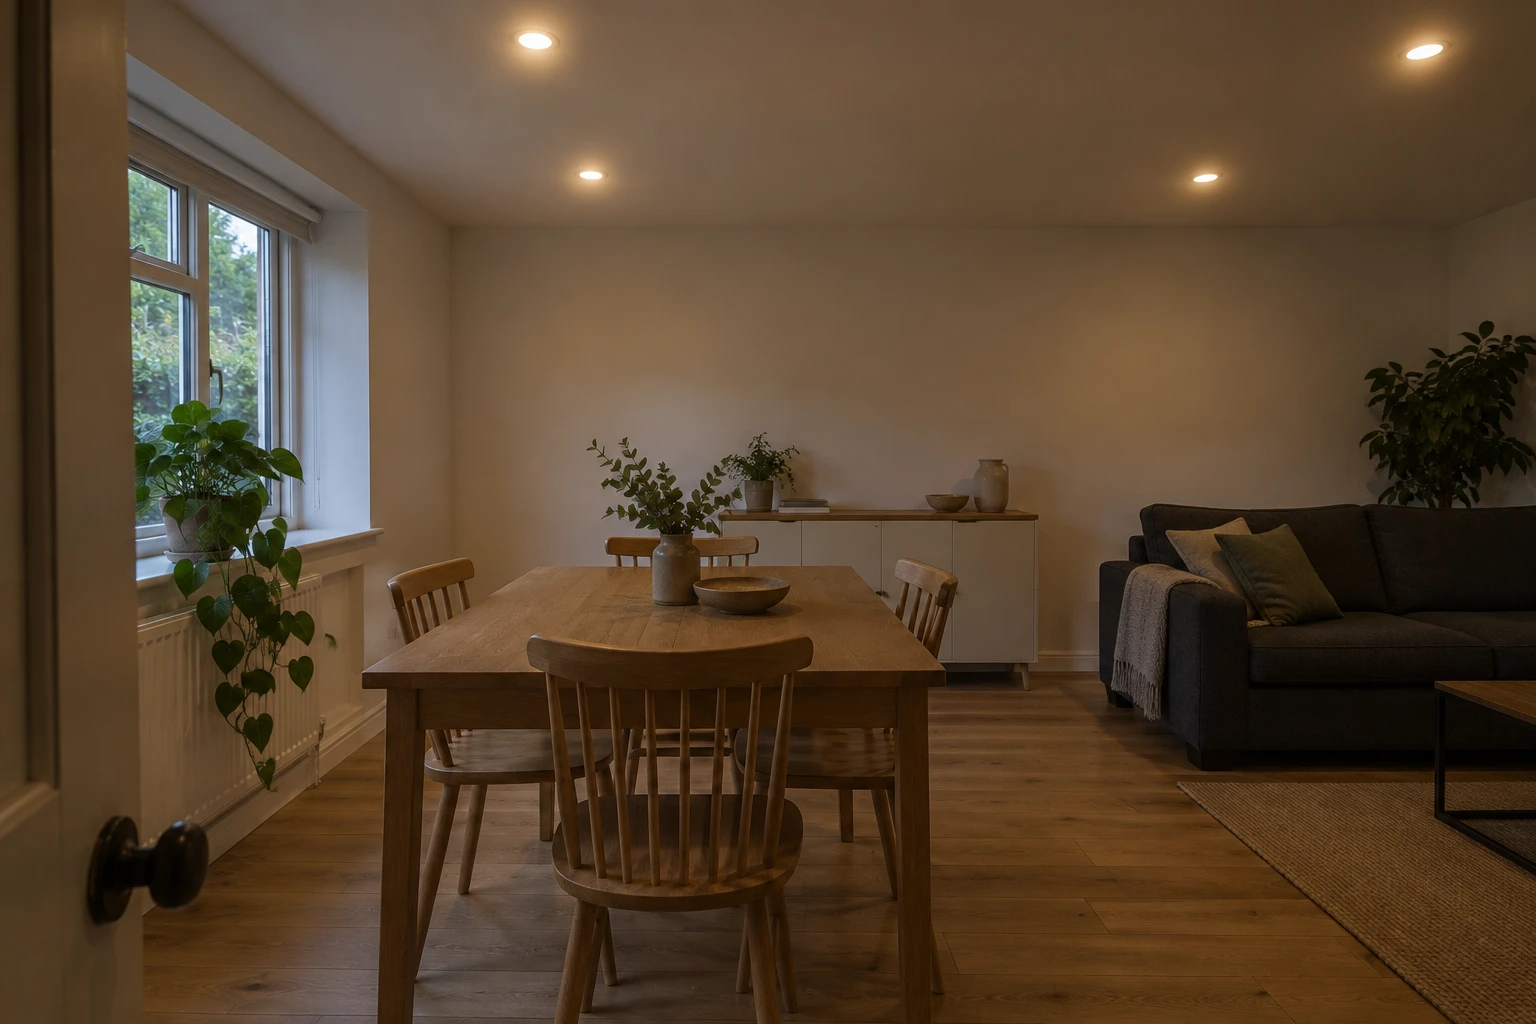
Compare the ceiling first, then the sofa. The broad yellow glow is reduced, the ceiling reads closer to white, and the charcoal upholstery is easier to see. The bulbs remain bright and the shadows beneath the chairs remain visible.
Set up your photo in AI Relight
Open AI Relight and upload the original JPG, PNG, or WebP. Use the full-size photo rather than a screenshot or a previously sharpened copy.
- Set Lighting Mood. Choose Natural Daylight for a dim room photographed during the day. For a ceiling-only or glare-only correction, clear the selection so the field shows Auto.
- Set Existing lights to Keep as in photo. This tells the tool which lights should stay on or off while you adjust their brightness or glare.
- Open Details and add a focused instruction. Use one of the prompts below, adapted to the objects in your photo.
- Choose Quality and generate one image. SD (Beta) is the option labeled “Better at preserving your original scene.” It uses 50 credits per image and requires paid access. Basic uses 10 credits per image and Pro uses 40. Check the amount on Generate before submitting.
Brighten a dark room without blowing out the lights
Look at the darkest useful parts of the photo: the front of the sofa, the floor beside it, or the dining chairs. If their outlines and textures are visible, name those areas in the prompt.
Gently brighten the dark sofa, dining chairs, and floor so their textures are visible. Keep the window and ceiling lights from getting brighter. Retain soft shadows under the furniture and natural contrast. Preserve the furniture shapes, fabric texture, wood grain, wall colors, and camera view. Adjust lighting only.
Choose Natural Daylight when you want the room to read as a daytime photograph. If you like the current evening atmosphere, leave Lighting Mood on Auto and add “Keep the existing evening atmosphere” to the instruction.
Compare the result at normal viewing size. The dark sofa should still look like dark fabric. If it becomes pale gray or the room looks flat, ask for a smaller shadow lift and more of the original contrast.
Reduce glare around recessed ceiling lights
A lit bulb can remain bright. The distracting part is often the large halo around it, which hides the trim and spills over the ceiling.
With Lighting Mood on Auto and Existing lights on Keep as in photo, try:
Reduce the bright halos around the existing recessed ceiling lights. Keep every light visibly on, with the same round trim, size, count, and position. Keep a small bright center in each light. Preserve the surrounding ceiling texture, room exposure, furniture, and camera view. Change only the glare around the lights.
Check the fixtures near the edges of the frame as well as those in the center. A smaller halo is useful only if the light still has the right shape and mounting position.
If a fitting changes shape, return to the original and narrow the request to the surrounding halo. When a fitting is recorded as a completely white patch, an AI edit may invent its hidden shape; use a darker original exposure if you have one. For a small local correction with existing detail, a masked highlight adjustment in Lightroom gives direct control over the affected area.
Make a white ceiling look white again
First decide whether the ceiling is too dark or the wrong color. A gray ceiling may need a slight lift. A yellow ceiling may need a color correction even when it is already bright enough.
For a ceiling you know is painted white, try:
Reduce the yellow color cast on the white ceiling so it reads as a natural neutral white. Retain its existing texture and gentle shading. Keep the wood warm brown, the sofa its original color, and the walls unchanged. Keep the ceiling lights in their original on/off states. Do not brighten the whole room or alter any objects.
Keep Lighting Mood on Auto for this ceiling-only correction.
Compare the ceiling with the wooden furniture and any cream-colored finishes. You want to remove the unwanted cast without bleaching the rest of the palette. If the wood has turned gray, start again from the original and specify that the correction applies only to the ceiling.
Check the room details before keeping the result
Switch between the original and edited image at the same zoom to compare:
- Hard edges: cabinet seams, window frames, chair spindles, and light trims should keep their shapes and positions.
- Fine texture: look for recognizable fabric weave, wood grain, and leaf detail. A smoother surface is not necessarily a sharper one.
- Light and color: shadows should still give furniture depth; white surfaces should retain shading; wood and textiles should keep their colors.
If the result looks painted or the furniture has changed, return to the original and ask for a smaller lighting change. Avoid sharpening the altered result to compensate for missing texture.
To refine a version you like, upload that image to the AI Image Editor and describe the remaining change. For a different lighting approach, start from the original again so each attempt can be compared against the same photo. Our guide to keeping existing furniture in AI room edits covers more specific preservation instructions.
Frequently asked questions
How do I fix bad lighting in a room photo on my phone?
Open AI Relight in your phone's browser and upload the photo from your library. Use Details to name the lighting problem, generate one version, and compare it with the original. Zoom in on the lights and furniture before downloading; a small screen can hide softened texture.
Can I reduce ceiling-light glare while leaving the lights on?
Yes—ask to reduce the surrounding halos while keeping the bulbs visibly lit. Set Existing lights to Keep as in photo and specify that the trims, count, and positions should stay the same.
Should I use AI Relight or a regular photo editor?
For a slight exposure or white-balance correction, start with your regular photo editor. Use AI Relight when you want to describe a lighting change and set Lighting Mood and Existing lights. You can also request a ceiling-only correction in the Image Editor.
Can AI recover detail from a completely blown-out window?
It can generate a plausible view, but it cannot establish what was actually outside from an all-white patch. For a property photo, use a darker exposure from the same shot if available, or keep the bright window rather than inventing the view.
Fix the lighting in your room photo
Upload your photo and describe the dark area, harsh light, or color cast you want to adjust.