How to Upload a Floor Plan and Visualize It with AI
Upload a floor-plan image to explore furniture, flooring, and colors with AI. Follow the steps and try it with limited free credits after registration.
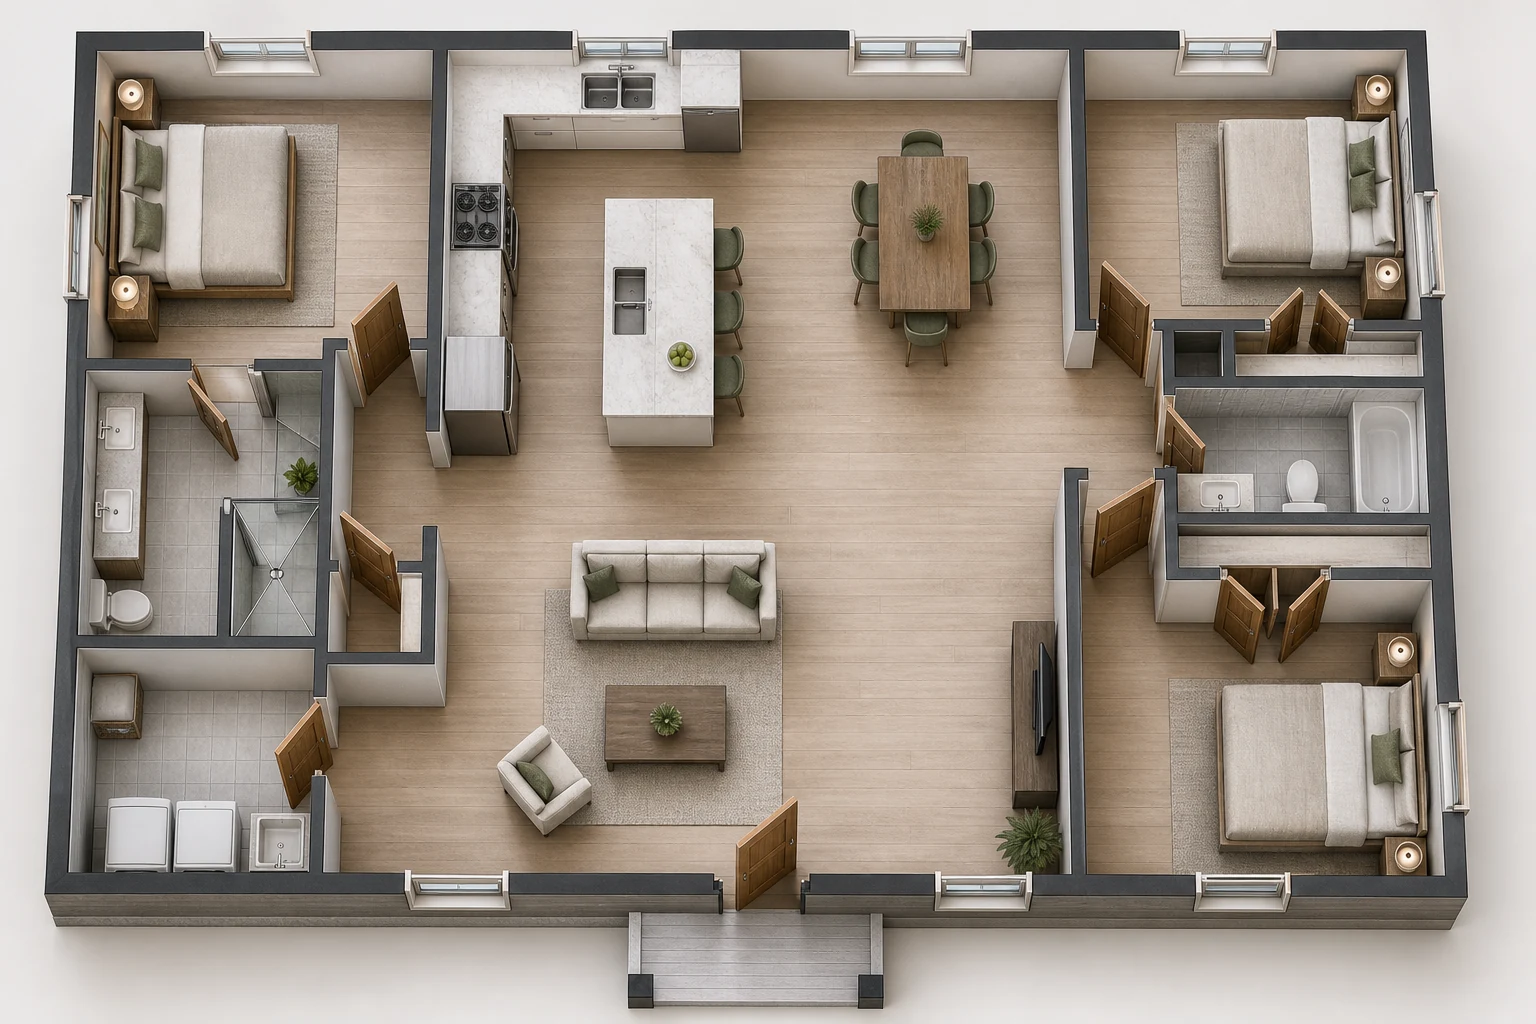
Upload a JPG, PNG, or WebP floor-plan image to ImagineMyHouse to generate a furnished concept image. Choose Floor Plan, Realistic, and Top View, then describe your materials in Details. New accounts receive limited free trial credits after registration, with no credit card required.
A floor plan shows where the rooms are. A furnished visualization helps you picture how flooring, furniture, and colors could work together. This guide walks you through preparing your drawing, choosing the settings in ImagineMyHouse's AI Plan Visualizer, and reviewing your first furnished concept.
The AI-generated illustrations in this guide compare a line drawing with a furnished visualization.
Which result do you actually need?
| Your next decision | Start with | What you get |
|---|---|---|
“What could this existing plan look like furnished?” | A rendered concept image based on your uploaded drawing | |
“Will this sofa fit, and where should the door go?” | A layout you work on with dimensions and placed objects | |
“I have requirements, but no plan to upload” | An initial plan concept to review and develop | |
“I have a perspective sketch, not a top-down plan” | A visual treatment of the sketch's viewpoint |
Prepare a readable plan image
Use JPG, PNG, or WebP. If your plan is a PDF or CAD file, export the relevant page or drawing to one of these image formats before uploading.
Before uploading:
- Crop to one floor or one clearly defined area. Remove unrelated elevations, title blocks, and large empty margins.
- Keep the complete outer boundary, internal walls, door openings, windows, and stairs visible.
- Use a straight digital export or a well-lit overhead photograph. Avoid angled phone photos, reflections, and faint pencil lines.
- Retain legible room names where useful, but remove personal names, an address, and other information the visualization does not need.
- Keep a copy of the original dimensioned plan to compare with the rendered image.
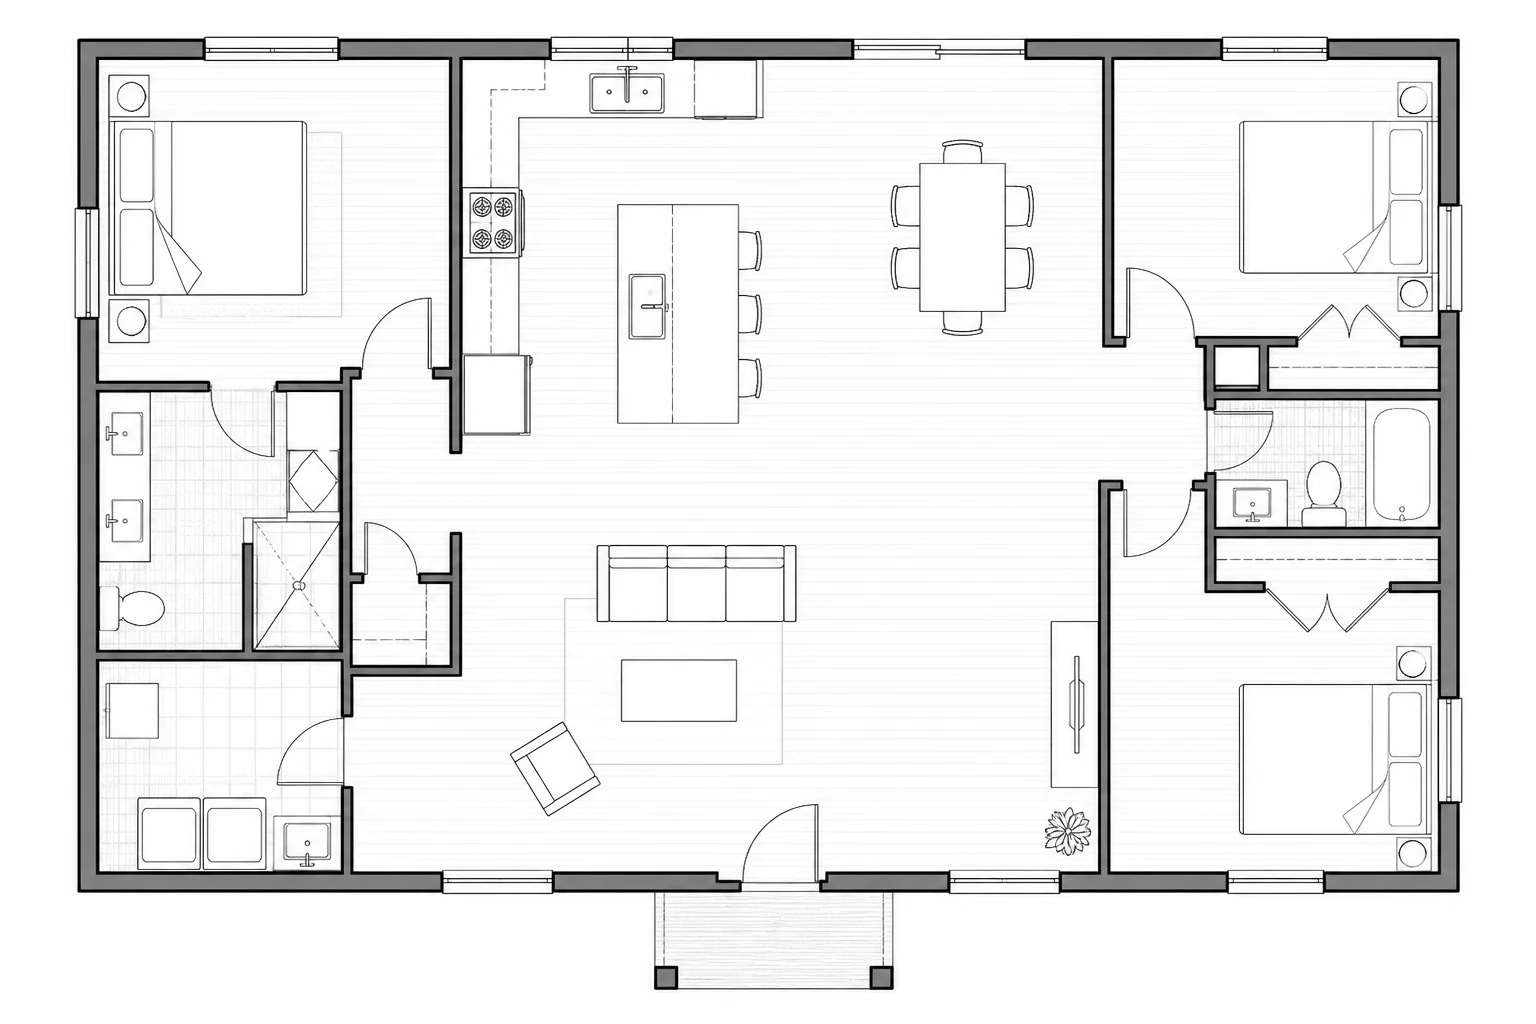
A single readable plan is a better starting point than a sheet containing six tiny drawings. If you want to explore only a bedroom, crop to that room with its doors and windows intact rather than asking the AI to find it inside a crowded presentation board.
How to upload and visualize your floor plan
1. Upload the image and choose Floor Plan
Open AI Plan Visualizer, sign in or create an account, and upload your prepared image. Under Plan Type, change the default Master Plan to Floor Plan for a home's interior layout.
Use the original image again for each meaningful design comparison. Repeatedly processing a previous result can carry its mistakes into the next version.
2. Start with a top view
For your first furnished concept, set Style to Realistic and View to Top View. A top-down view makes the room arrangement easier to compare with your original while you explore furniture and finishes. Try an aerial view or an illustrated style later when you want a different presentation.
3. Describe materials, room uses, and what should stay
Use the Details field to add a short brief. For a first furnished concept:
Visualize this residential floor plan from a top-down view. Follow the existing outer boundary, internal walls, doors, windows, and stairs. Use light oak flooring in the living areas, pale tile in the bathrooms, neutral upholstery, and simple contemporary furniture. Keep the room uses shown by the labels or existing fixtures. Do not add rooms or change the circulation routes.
If room uses are unclear, name them in your brief using their position in the drawing—for example, “The room at the upper left is a bedroom.”
To compare another finish direction, reuse the original plan and change only the materials—for example, “Use medium-tone wood floors and cream upholstery.” Keep the plan type, style, and view unchanged.
4. Generate, then check the plan before judging the decor
Choose the output quality and set the image count to one for your first attempt. Check the credit amount on the Generate button, then click it and compare the result with your original plan.
Compare the result against the original in a deliberate order:
- Count the rooms and compare the outer boundary.
- Check internal walls, openings, windows, and stairs.
- Check that the kitchen and bathrooms remain in their intended locations.
- Look for furniture covering doorways or creating implausible routes.
- Only then compare the flooring, furnishings, and visual style.
Save the versions that follow your plan, then compare their flooring and furniture palettes. If a wall or room changes, use the fixes below before refining the decor.
What to do when the result misreads your drawing
| Problem | Next attempt |
|---|---|
Rooms merge or walls disappear | Use a higher-contrast export, remove overlapping annotations, and return to Top View |
Door swings or stairs are misread | Make those marks clearer in the source image; compare them explicitly after generation |
Furniture hides the layout | Request simpler, less dense furnishing and reuse the original plan |
A material change also changes rooms | Narrow Details to the finish change and restate which walls and openings must remain |
You need exact object placement | Move that task to an editable planner rather than trying to perfect it through image generation |
Input cleanup is often a more productive next step than a longer prompt. When the drawing is ambiguous, the AI has to invent an interpretation.
Does this create an editable 3D model?
No. The result is a rendered image, not an editable 3D or CAD model. Use it to compare finishes and furniture styles. To change walls or room arrangements, edit the 2D layout in Floor Planner, export the revised plan as an image, and visualize it again.
For a renovation, bring the preferred image and your original measured plan together in the project brief. Our guide to using AI for home renovation covers how to connect those visuals with the decisions that happen before work begins.
Can I upload and visualize a floor plan for free?
Yes. New accounts receive limited free trial credits after registration, with no credit card required. Generations use credits; see pricing for paid options once your trial allowance is used.
For your first attempt, explore one flooring and furniture palette. Upload your floor plan and create a furnished concept for your next design discussion.
See your floor plan furnished
Upload your plan image and explore flooring, furniture, and colors for your space.